
Floor plan to 3D guide
How to Convert a 2D Floor Plan to 3D
Start with a scanned blueprint or generate a layout from scratch, then turn it into an editable 3D room and furnish it in the same browser workflow.
On this page
Overview
A three-stage path from a flat plan to a furnished room
The workflow stays simple whether you already have a floor plan image or need to create one first. Each stage leaves you with an editable result, so you can review the layout before moving on.
Get your 2D floor plan
Upload an existing plan or create a new layout with the Floor Plan Generator.
Convert the plan to 3D
Generate walls, openings, and room proportions, then review the editable 3D model.
Furnish and refine
Add furniture and finishes, then move, rotate, or resize each item in the 3D scene.
Step 1
Choose one of two ways to get your 2D plan
Use the route that matches what you have now. Both routes lead into the same editable 3D design workflow.
Path A · I have a floor plan
Upload an existing floor plan
This route works well for scanned drawings, exported plans, and clear photos of a blueprint. The clearer the walls, doors, windows, labels, and dimensions are, the easier the plan is to interpret.
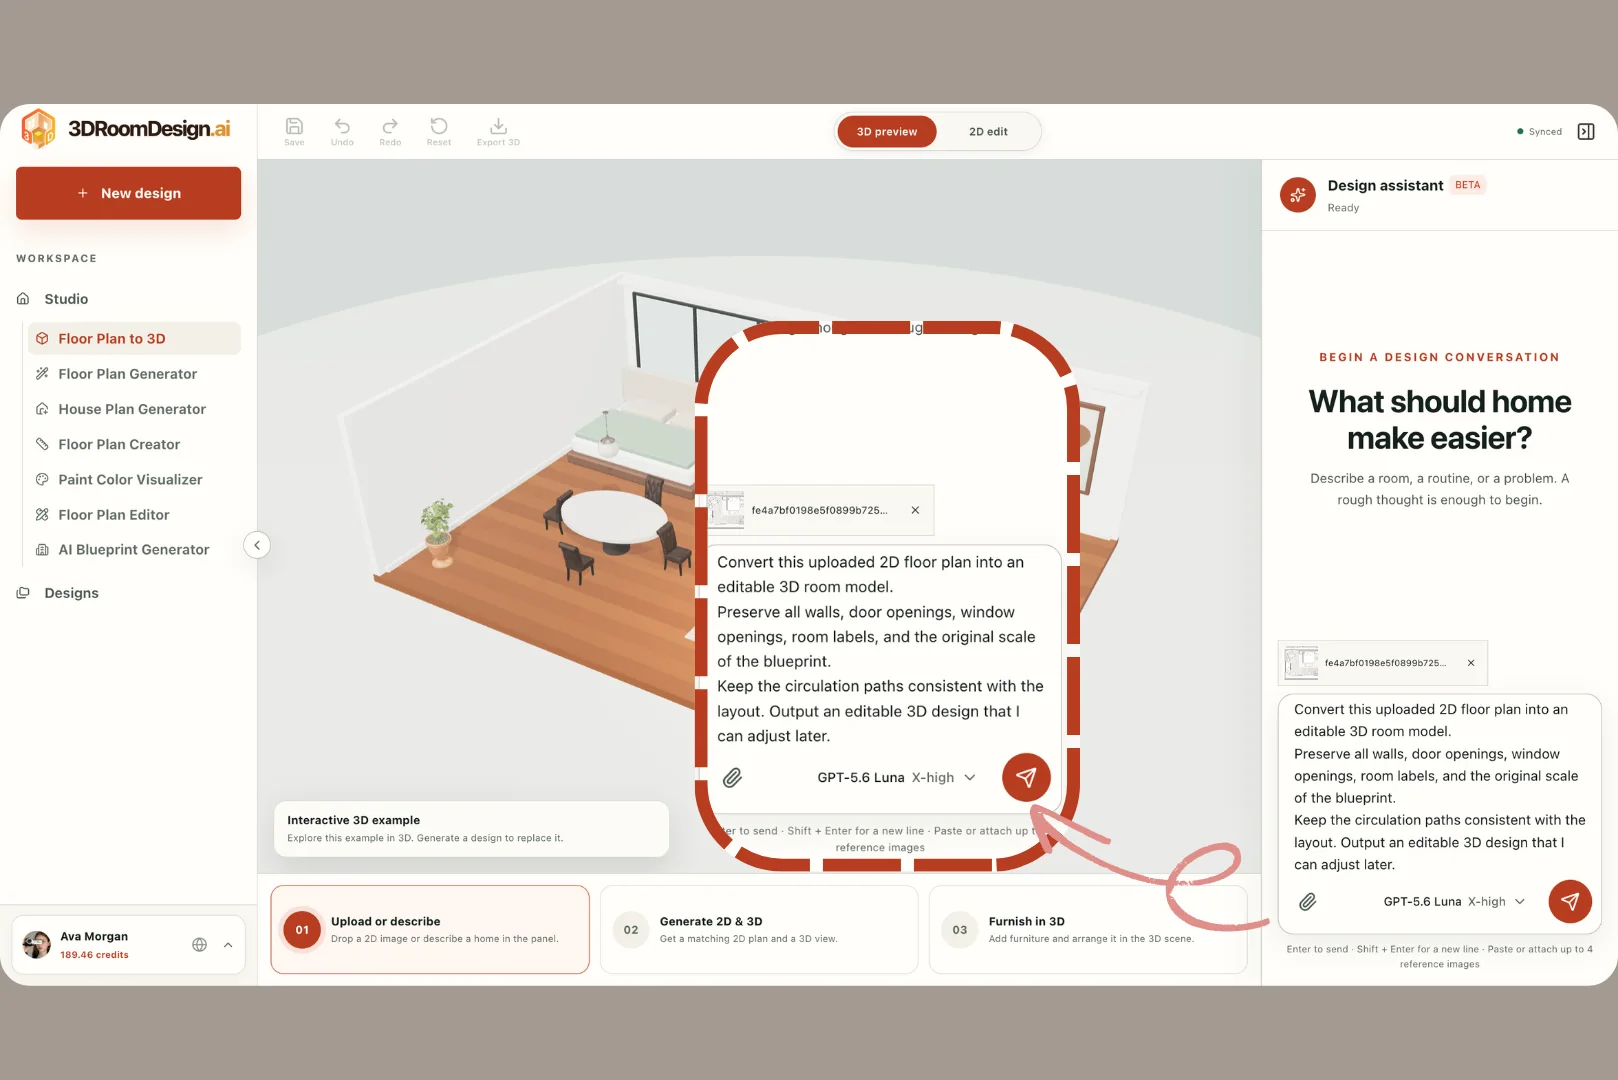
Open Floor Plan to 3D and find the Design assistant input.
Attach your floor plan image. Add supporting reference images only when they clarify materials, style, or layout intent.
Describe what the 3D model must preserve, including walls, openings, room labels, scale, and circulation.
Send the request, review the generated room shell, and correct any assumption before furnishing.
Recommended prompt
Convert this 2D floor plan into an editable 3D room. Preserve the walls, door and window openings, room labels, original scale, and circulation paths. Keep the result adjustable so I can refine it later.
Path B · I need a floor plan
Generate a 2D floor plan first
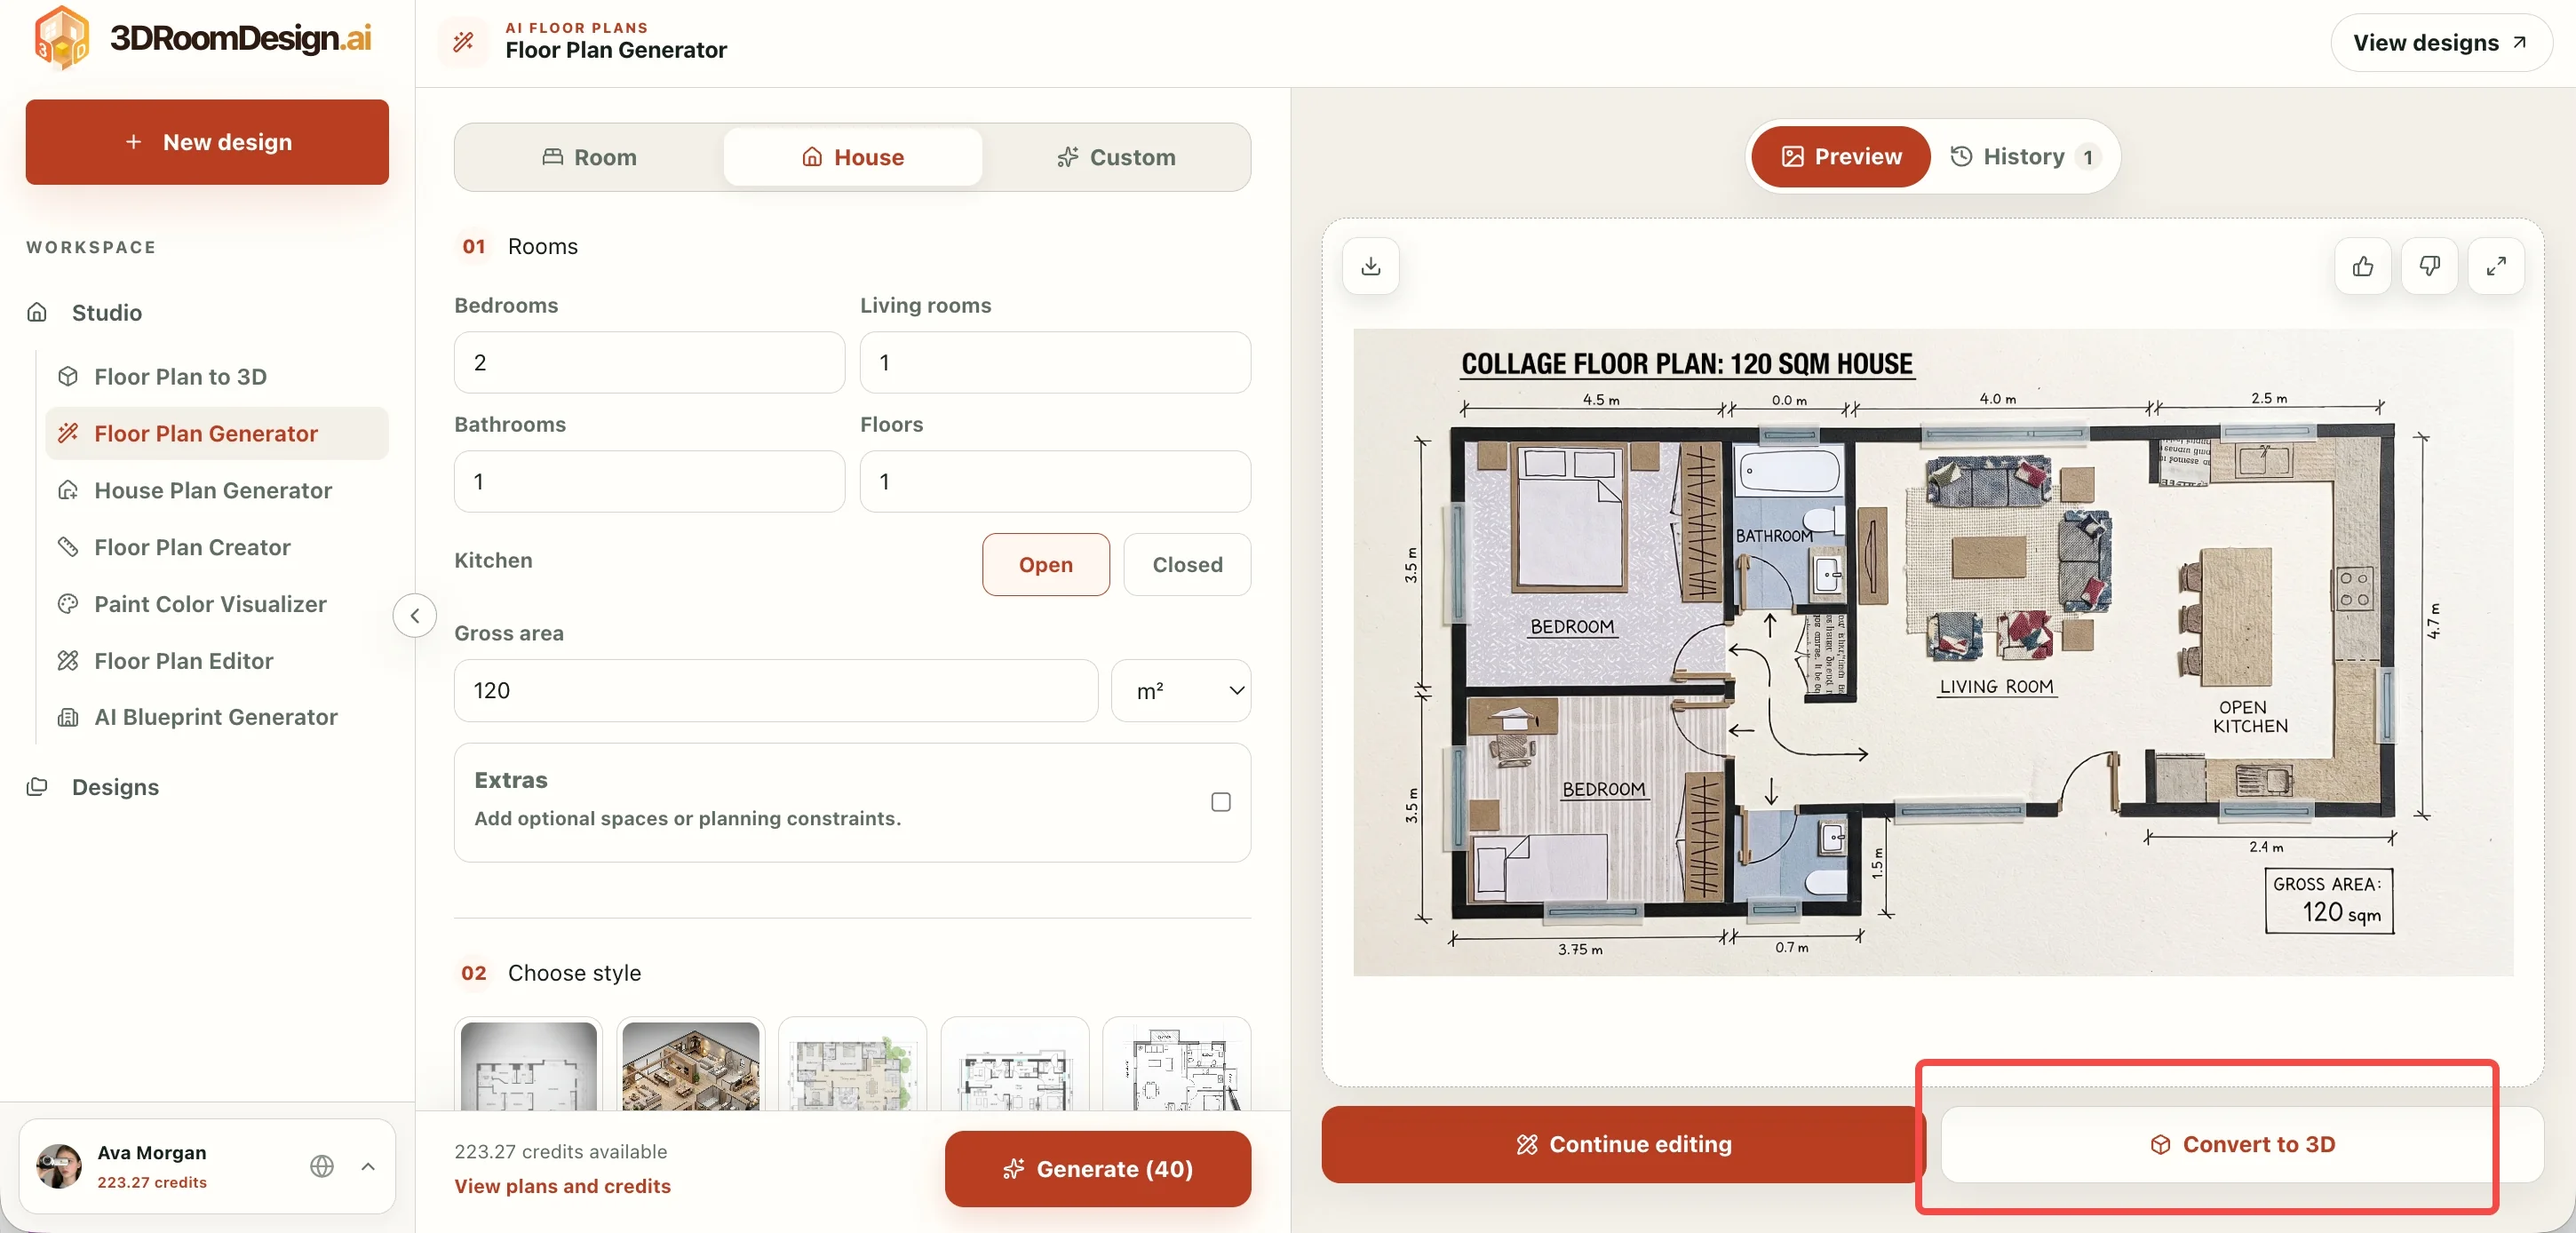
If you are starting from a room list rather than a drawing, create a floor plan by setting the space type, room counts, area, and visual style.
Open the Floor Plan Generator and choose Room, House, or Custom.
Set the room counts, floor count, kitchen type, total area, and any planning constraints.
Choose a floor plan style that makes walls, openings, and room boundaries easy to read.
Generate the plan, review the preview, and select Convert to 3D when the layout is ready.
Step 2
Convert the 2D plan into an editable 3D room
Once the plan is ready, use the conversion action to build the room shell. Treat the first model as a reviewable draft: confirm the structure before you spend time on furniture and finishes.
Start the conversion
Select Convert to 3D from a generated plan, or send the conversion request with your uploaded image attached.
Review the instructions
Check the prompt for room scale, wall positions, openings, labels, ceiling height, and any style direction you want the model to follow.
Inspect the 3D result
Compare the model with the source plan. Correct missing walls, misplaced openings, or proportion issues before moving to decoration.
Before generating, check the credit cost shown in the interface. Costs can vary by action, so use the current value displayed on the button rather than an old screenshot.
Step 3
Add, place, and refine furniture in 3D
With the architecture checked, build the room from large objects to small details. Establish circulation with the main pieces first, then add lighting, wall finishes, and floor materials.
Manual placement
Browse the catalog, add an item to the room, then position it precisely with the scene controls and inspector.
AI-assisted changes
Describe a clear change, such as moving a chair closer to the window, and review the result in the 3D view.
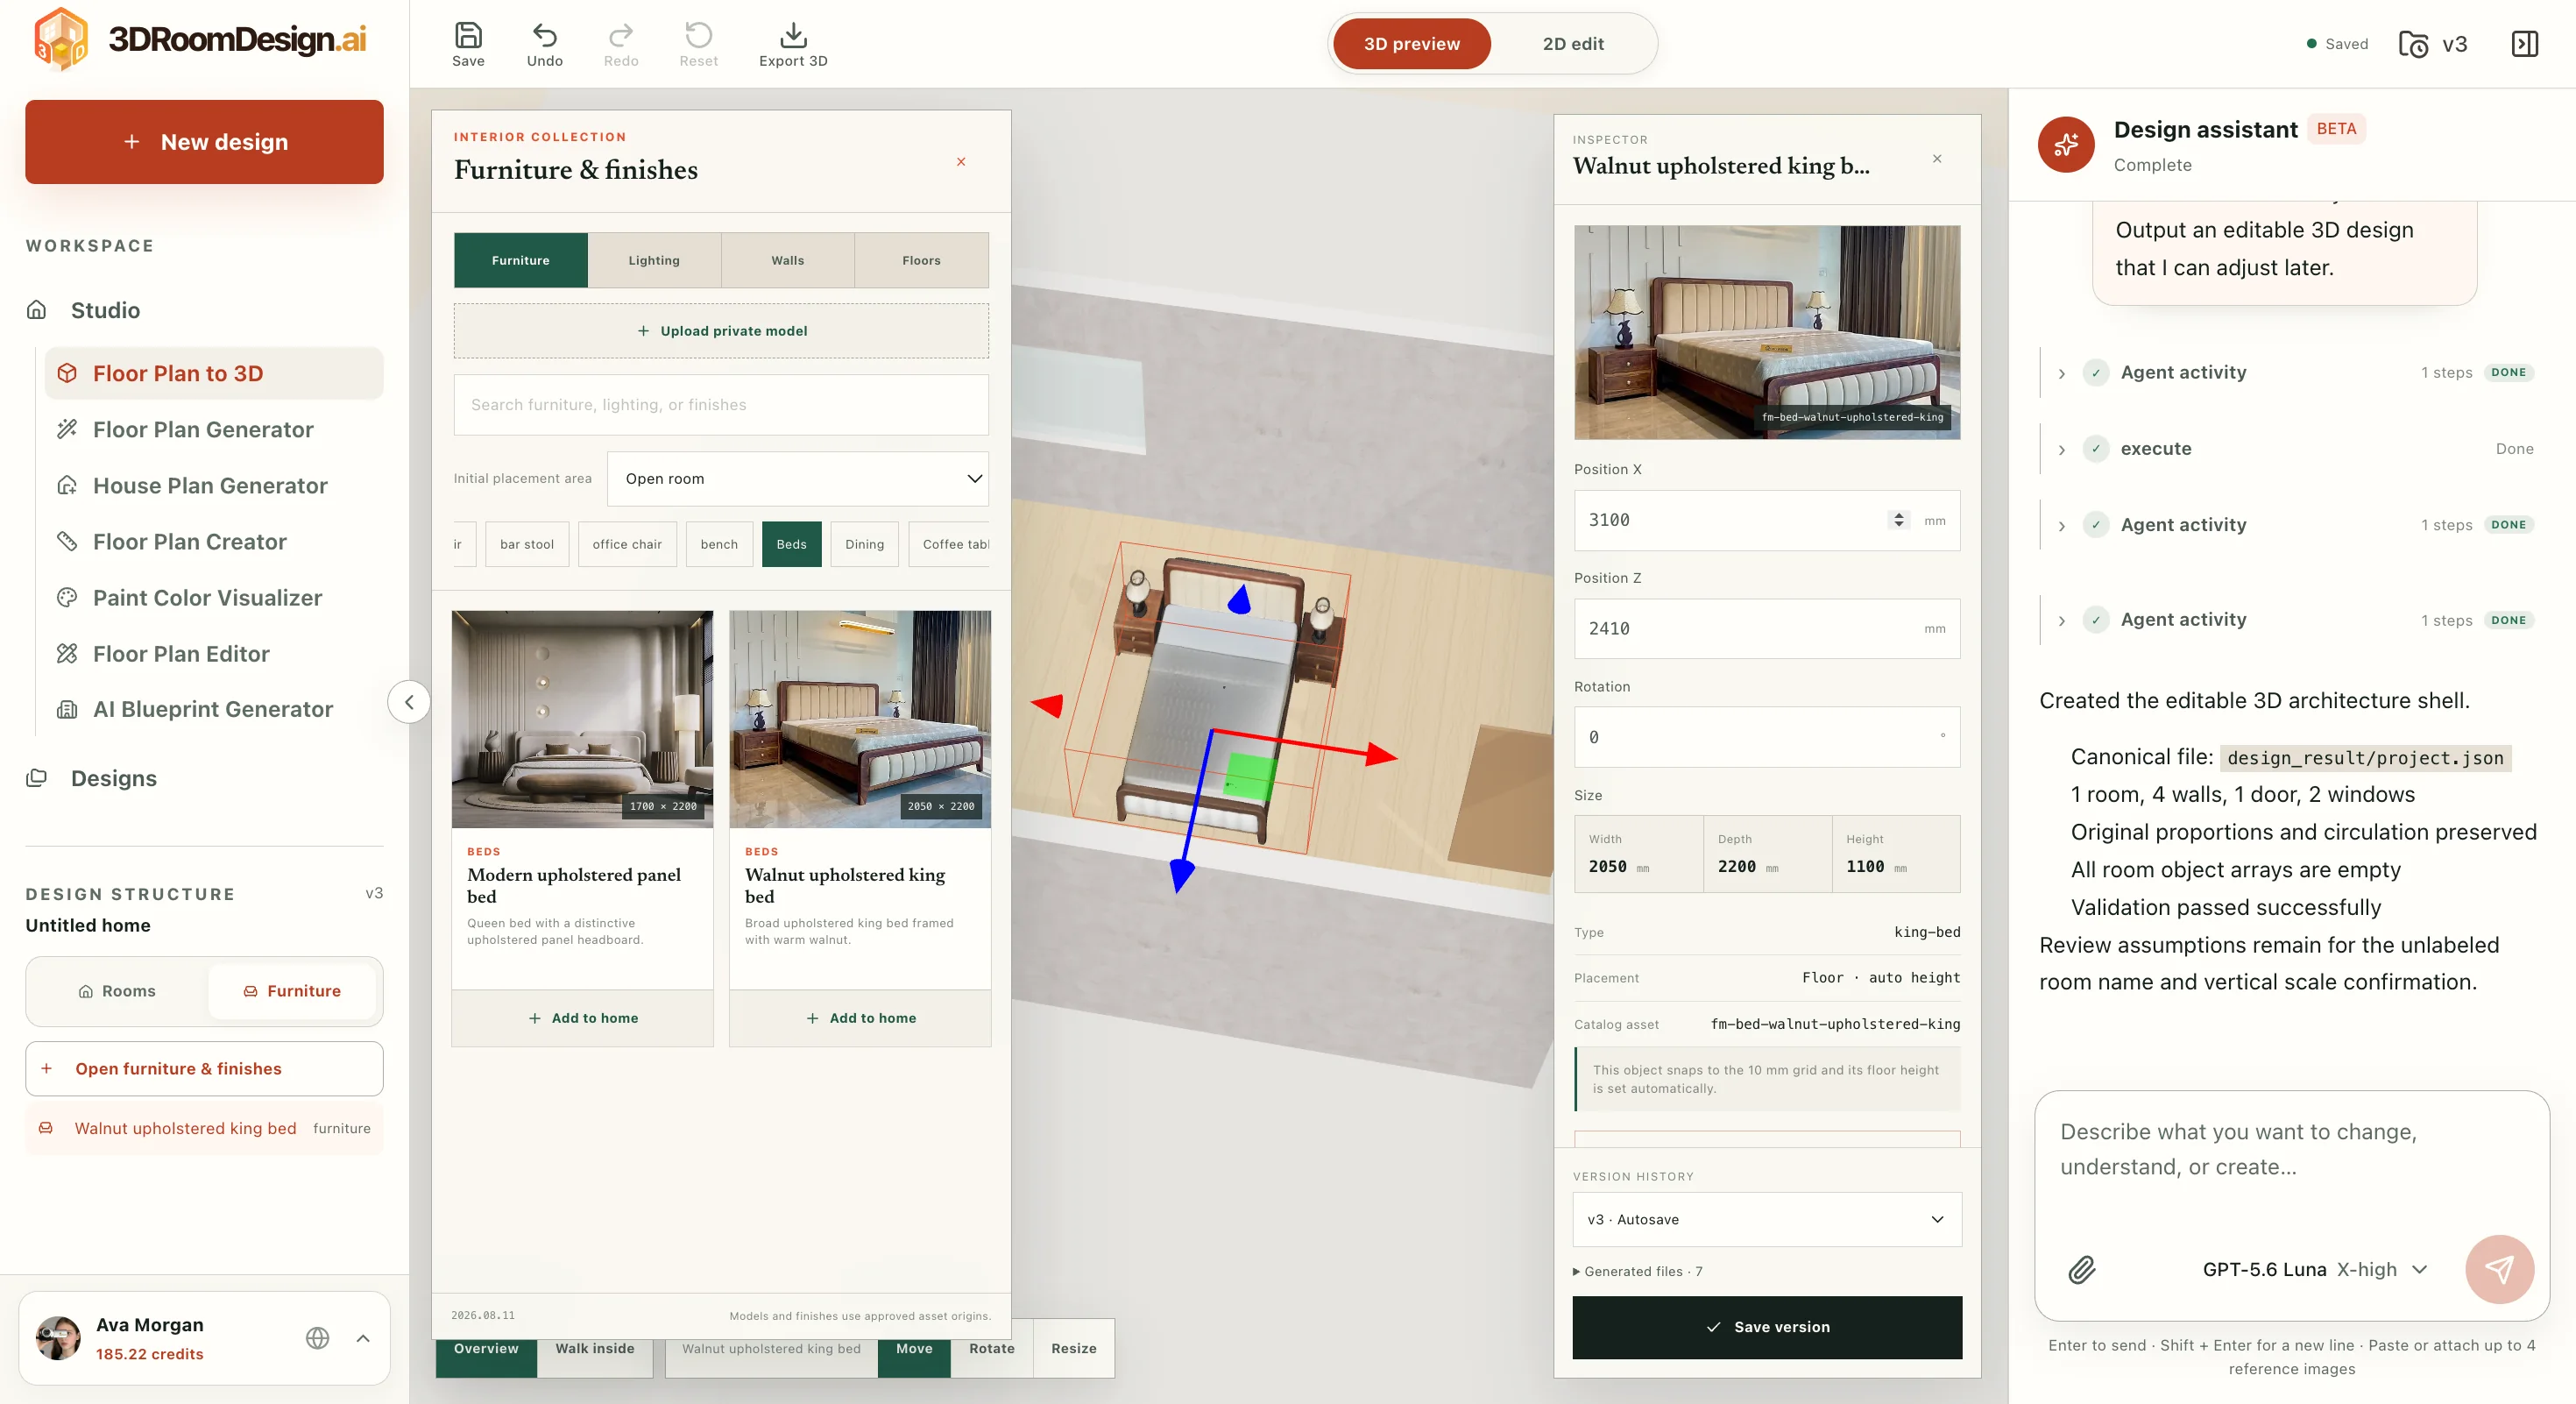
Open Furniture & finishes from the design structure panel.
Switch between Furniture, Lighting, Walls, and Floors, then search or browse by category.
Add the largest pieces first and keep doors, windows, and circulation paths clear.
Select an object to move, rotate, or resize it, and use the inspector for exact values when needed.
Reference
Know the controls you will use most
The conversion flow moves between the top toolbar, workspace tools, 3D scene, and Design assistant. These are the controls worth locating before you start.
Top toolbar
- Save keeps the current project version.
- Undo and Redo step backward or forward through edits.
- Reset returns the current work to its initial state.
- Export 3D prepares the design for download.
- 3D preview and 2D edit switch between spatial and plan views.
- The save or sync indicator confirms whether the latest changes are stored.
Related workspace tools
Use the tool that matches the stage of the job, then return to Designs to review saved work.
- Floor Plan to 3D
- Floor Plan Generator
- Floor Plan Creator
- Floor Plan Editor
- AI Blueprint Generator
- Designs
FAQ
Tips and troubleshooting
Quick answers for the most common questions that come up during 2D-to-3D conversion.
Start your design
Turn your own 2D floor plan into a room you can edit in 3D.
Upload a plan or begin from a generated layout, review the room shell, and then add furniture when the structure is right.
Convert my floor plan to 3D